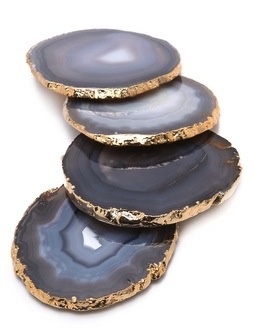
Inspired by my favorite stone, Lapis Lazuli, I decided to get a little creative this week with my finger nails. Thats right, I whipped out my nail art paintbrush and decided to challenge my non-ambidextrous ways. If you can paint your own nails, you're in the clear, the rest is easy. If not- take all the supplies below to your manicurist, and you too will be in the clear. Voila!
What you'll need: Blue nail polish (I used OPI's 'Dating A Royal'), Topcoat, a small paintbrush, Color Club Gold Foil Flakes (also seen in last week's 5 under $50 story)
Step 1: Paint your fingers with the blue polish and top with a thin layer of top coat. Let dry almost completely.
Step 2: Dip your brush into a very small drop of topcoat. You don't want a lot because your brush will be rock hard for the rest of your life. Stick the brush to pieces of the foil, one at a time.
Step 3: Using your brush, press the foil down onto your nail, it'll stick right away. Keep pressing all the edges down with your brush until the foil is flattened and pretty wrinkle-free.
Step 4: Repeat Step 3
Step 5 (optional): You can press your finger into little gold foil dust pieces and lightly press it onto your nails for very tiny glitter pieces. Do not attempt with brush- follow directions. Fingers.
Step 6: Cover all your nails with an extra layer of topcoat, and another until nails are smooth.
The finished product!
I am looking forward to using these gold leaf foils like crazy- maybe cover my entire nails with them next time???


Your nails look so fab!!
ReplyDeletecoach outlet store online
ReplyDeleteair jordan shoes
mcm bags
puma shoes
green bay packers jerseys
toms shoes
michael kors handbags
snapback hats
new balance shoes
oklahoma city thunder jerseys
marc jacobs
timberland boots
true religion jeans
baltimore ravens jerseys
instyler
nike huarache
oakley sunglasses
san antonio spurs jerseys
kobe 9
cheap soccer jerseys
dallas cowboys jersey
burberry outlet
michael kors uk
celine outlet
karen millen dresses
cheap oakley sunglasses
futbol baratas
fitflop shoes
beats by dre
air jordan shoes
cai201569
nike roshe
ReplyDeletetim brown jersey,art shell jersey,kenny stabler jersey,john matuszak jersey,howie long jersey
cheap ugg boots
bottega veneta wallet
michael kors handbags,michael kors outlet,michael kors outlet online,michael kors,kors outlet,michael kors outlet online sale,michael kors handbags clearance,michael kors purses,michaelkors.com,michael kors bags,michael kors shoes,michaelkors,cheap michael kors
moncler coats
tory burch outlet
nike air max 90
manchester united jersey
nike sneakers
nike air max
chanel outlet
vibram fivefingers
dwyane wade jersey
nike free run uk
nike free,nike free run,free running,free run,nike running
the north face outlet
north face jackets
kate spade sale
lebron 12 shoes
oakley sunglasses
cheap oakley sunglasses
packers jerseys
real madrid football shirts
kyrie irving jersey
michael kors outlet
nike air max
cheap football shirts
hermes belts for men
supra footwear
yongri0708
burberry outlet online
ReplyDeletecalvin klein
celine handbags
chanel bags
chanel handbags
baseball bats
cheap jerseys
cheap jerseys
cheap jordans
cheap michael kors
cheap nike shoes
cheap oakley
cheap oakley sunglasses
cheap oakley sunglasses
ray-ban sunglasses
cheap shoes
ugg boots
chi flat iron
christian louboutin
christian louboutin
christian louboutin outlet
christian louboutin shoes
louboutin
christian louboutin
new balance outlet
new balance shoes
cheap coach purses
nfl jerseys
air max
air max
nike air max
nike factory
2015826dongdong
ReplyDeletejordan 6 cigar
michael kors outlet
ed hardy clothing
michael kors
oakley sunglasses outlet
pandora charms
michael kors outlet online
ray ban outlet
tory burch outlet
nike free run
barbour coats
kate spade handbags
michael kors handbags
oakley vault
michael kors handbags
louis vuitton
adidas superstar shoes
louis vuitton outlet
coach outlet
air force 1
jordan 4
toms outlet store
coach factory outlet
christian louboutin sale
oakley sunglasses
jordan pas cher homme
christian louboutin outlet
oakley sunglass
abercrombie
air jordans
ray-ban aviator
oakley sunglasses outlet
gucci shoes
michael kors outlet
louis vuitton
louis vuitton outlet
oakley sunglasses cheap
louis vuitton
coach outlet
louis vuitton outlet